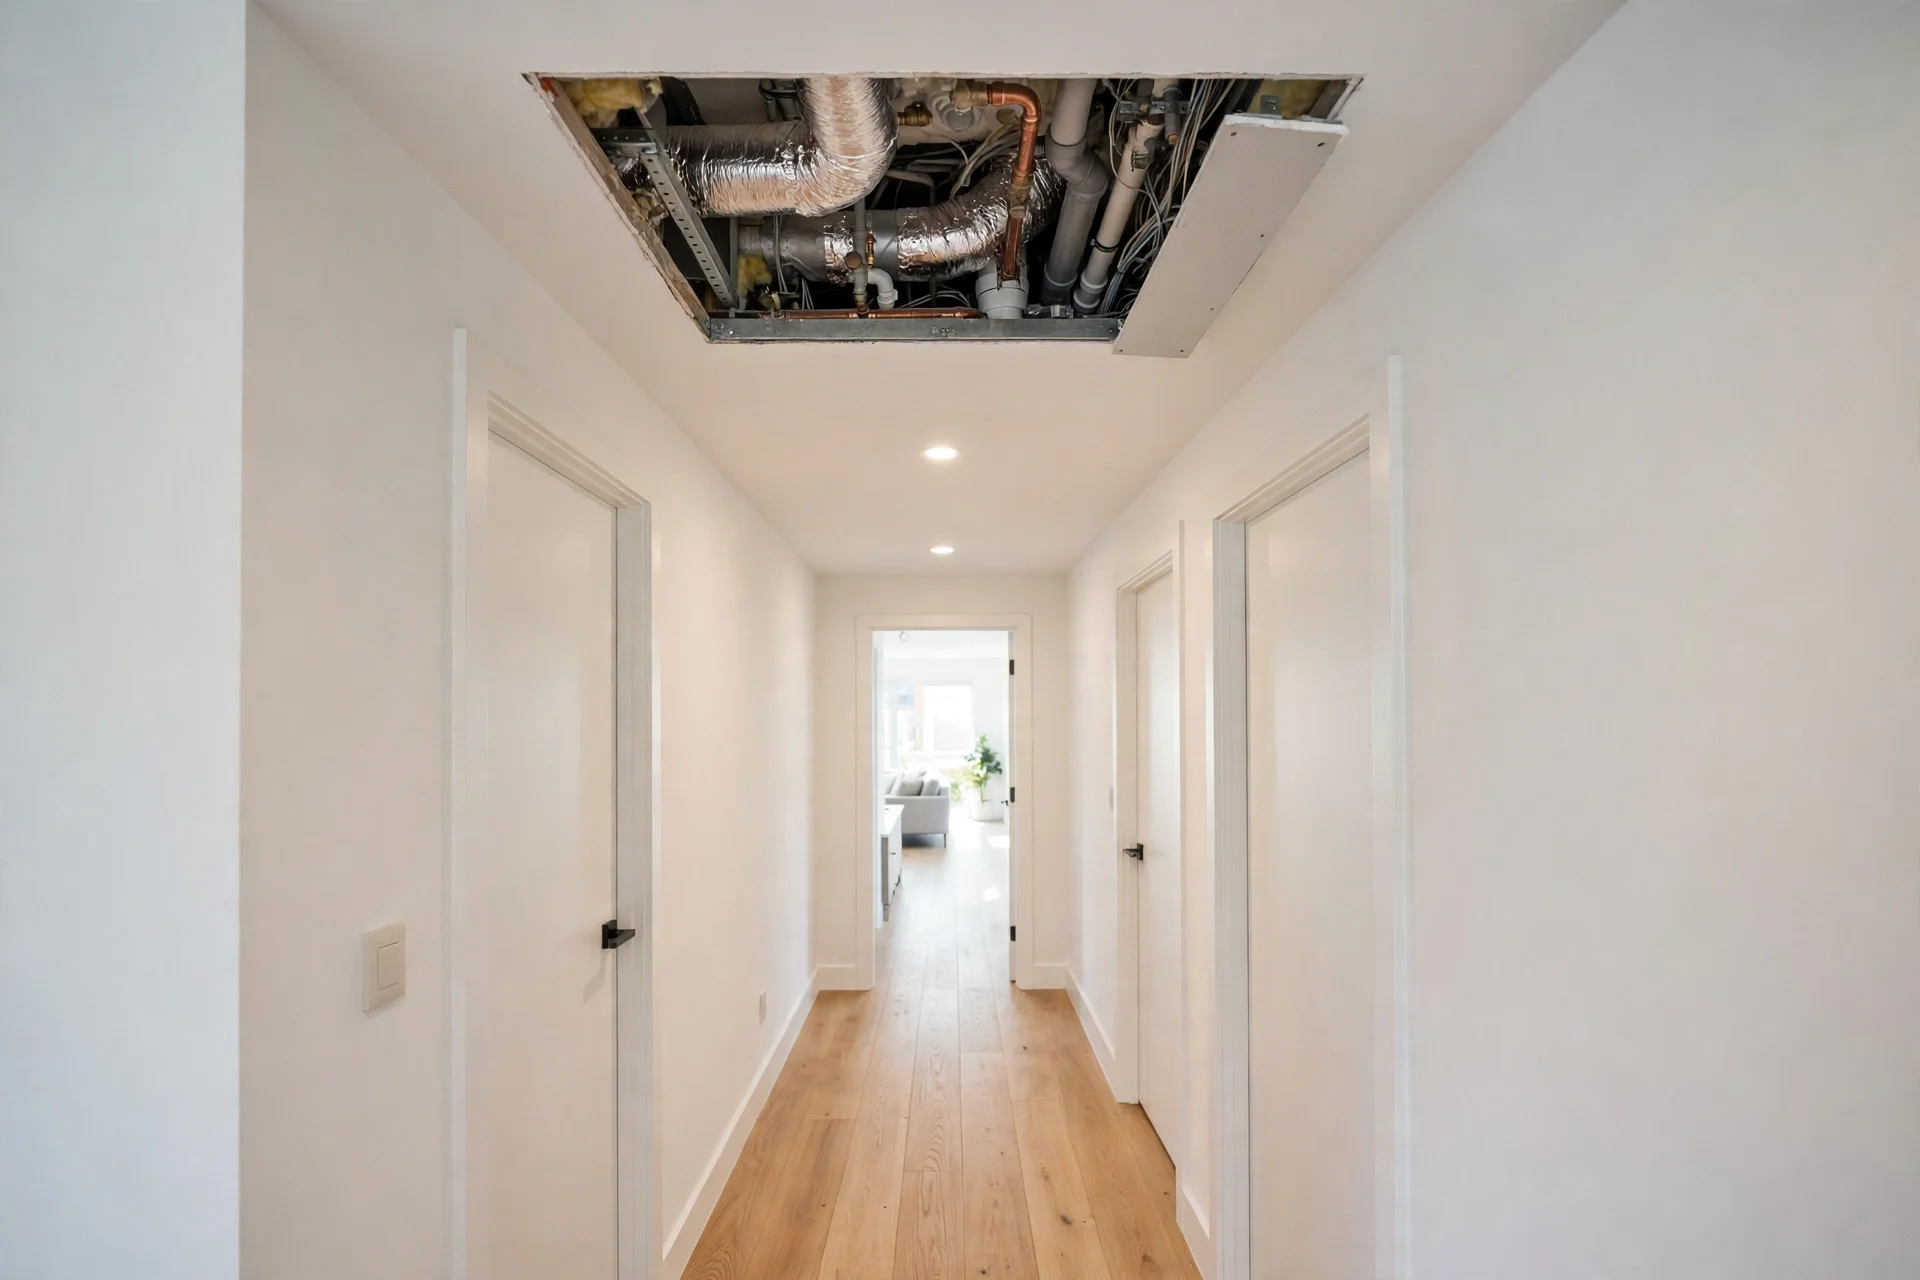
How to Create a Removable Ceiling Service Corridor for Accessing Concealed Residential Mechanical Installations
Every home hides its working parts above the ceiling: ductwork, plumbing pipes, electrical cables, and junction boxes that all need occasional attention. When that ceiling is solid plasterboard, every repair means cutting a hole, patching it, and repainting, which is why so many small jobs get postponed until they become big ones. A removable ceiling service corridor solves the problem by turning a strip of the ceiling into a planned access route, with lift-out panels or a suspended grid that opens the plenum above without damage. This guide shows how to plan the corridor, choose the panel system, keep the services organised inside it, and finish it so the ceiling still looks like a ceiling.
The Repair Bill That a Sealed Ceiling Hides Until It Arrives
A sealed ceiling looks clean, but it charges for that cleanliness the first time something above it needs attention. A leaking pipe joint, a damper that has stuck shut, a junction box that needs inspection, or a cable that needs replacing all require the same expensive ritual: cut the plasterboard, do the work, fit a patch, tape and fill the joints, sand, prime, and repaint the whole ceiling so the patch does not show. A job that should take an hour takes a day, and the ceiling is never quite as flat afterwards.
The hidden cost is not just money. Homeowners postpone small jobs because opening a ceiling feels like a major project, so a dripping joint goes unreported, a noisy fan motor goes unserviced, and a filter that should be changed every few months stays in place for years. By the time the work can no longer be avoided, the repair is bigger and the damage wider. A service corridor removes that barrier entirely, because access becomes a matter of lifting a panel rather than demolishing a surface.
What a Ceiling Service Corridor Actually Opens Up Above Your Head
A ceiling service corridor is a defined strip of removable ceiling, usually running along the route of the main services, that gives clear access to the plenum, the void between the structural ceiling and the finished surface below it. The plenum is where the house keeps its mechanical systems: heating and cooling ducts, water pipes, waste pipes, electrical cables, junction boxes, and the dampers and valves that control them. In most homes this space is between 150 and 300 millimetres deep, which is enough to work in if the access is planned properly.
The corridor is not the whole ceiling. It is a route, typically 600 millimetres wide, that follows the services from one end of the room to the other, with removable panels along its length and fixed plasterboard everywhere else. When a panel is lifted, a technician can reach the duct, the valve, or the junction box directly above it, and when the panel goes back, the ceiling looks untouched. The corridor turns the plenum from a sealed mystery into a maintainable part of the house.
| Corridor element | Typical detail | Why it matters |
|---|---|---|
| Corridor width | 600 mm, following the service run | Wide enough to reach in and work comfortably |
| Plenum depth | 150 to 300 mm above the finished ceiling | Room for ducts, pipes, and hands |
| Panel size | 600 x 600 mm or 600 x 1200 mm | Matches standard grid modules and tile sizes |
| Access points | At every valve, damper, and junction box | No cutting when maintenance is due |
Planning the corridor starts with a map of what is already above the ceiling. Before any panel is fitted, it is worth lifting a small inspection section or using an endoscope camera to see where the ducts run, where the pipes turn, and where the junction boxes sit. The corridor should follow those routes, not fight them, because a panel that opens onto empty plenum is wasted, while a valve hidden under fixed plasterboard defeats the whole purpose.
Suspended Grids, Lift-Out Tiles, and Flush Access Panels Compared
The most common removable ceiling is the suspended or drop ceiling, built on a lightweight T-bar grid of main runners and cross tees that form a regular pattern of openings, most often 600 by 600 millimetres or 600 by 1200 millimetres. Individual tiles lift out by pushing up, tilting diagonally, and lowering them through the opening, which makes access instant and tool-free. A minimum clearance of about 75 millimetres between the structural ceiling and the grid is needed for the tiles to manoeuvre, though a deeper plenum is better for working room.
Flush access panels suit rooms where a grid would look wrong. A recessed or drywall-inlay panel accepts a piece of plasterboard within its frame, with a mud-in flange that is covered with joint compound and painted, so the panel sits perfectly flush with the surrounding ceiling and the seam shrinks to a fine hairline. Push-latch mechanisms open with a simple press and need no visible handles, while hinged panels suit heavier doors. The trade-off is that a flush panel opens only where it is fitted, while a grid opens anywhere along the corridor.
Mapping the Services Before a Single Panel Goes In
A service corridor works only if the services inside it are organised. Ducts should run in straight lines along the corridor, pipes should be clipped to one side with valves facing down toward the panels, and junction boxes should sit within arm’s reach of a panel opening. Cables should be supported on trays or clips rather than draped across the joists, and every valve, damper, and junction box should be labelled from below so a technician knows what sits above each panel without lifting it.
Run ducts along the corridor centre so their dampers and joints are reachable from below.
Clip pipes to one side with stop valves and cleanouts facing down toward the panels.
Place junction boxes within reach of a panel, never buried under fixed plasterboard.
Label every access point from below, so the right panel is lifted first time.
Leave a cable tray or conduit route for future circuits, so new wiring never needs a new hole.
This mapping is best done before the ceiling is finished, when the services are still visible and can be moved cheaply. Retrofitting a corridor into a finished ceiling is possible, but it means cutting a strip, rerouting anything that crosses it, and living with the dust. The hour spent planning the route on paper saves a day of cutting and patching later, and it is the difference between a corridor that works and one that merely looks like one.
Fire Ratings, Acoustic Separation, and the Rules That Limit the Design
A removable ceiling is not suitable everywhere, and the limits are set by fire safety and sound. Panels must never be fitted in a fire-rated ceiling unless they are themselves fire-rated, because an ordinary tile or hatch in a rated assembly breaks the fire barrier and can void a building approval. Fire-rated access panels are built from heavy-gauge galvanised steel and lined with fire-resistant material, and they are available in recessed styles that still look seamless, but they cost more and weigh more than standard panels.
Acoustics matter too, especially where the corridor runs beneath a bedroom or a home office. A suspended ceiling with lightweight mineral fibre tiles does little to stop sound, and ductwork in the plenum can carry voices and fan noise between rooms. Acoustic tiles, a layer of insulation above the corridor, and flexible duct connectors at the fan all help, and the corridor should never be used as a shortcut for running a duct straight through a wall that was meant to block sound. Local building codes govern both fire and acoustic requirements, so the design should be checked against them before any material is ordered.
Keeping the Corridor Looking Like an Ordinary Ceiling
The best service corridor is the one nobody notices. With a suspended grid, the trick is to align the grid with the room, so the corridor reads as part of a deliberate ceiling pattern rather than a repair. Tiles in the corridor should match the rest of the ceiling, and the grid lines should run true, because a wandering line draws the eye far more than the panels themselves. In rooms where the corridor is a single strip of flush panels, the panels should be spaced evenly and aligned with lights or other ceiling features so they look intentional.
Align the grid with the room so the corridor reads as part of the ceiling pattern.
Match tiles and paint exactly, and keep spares for replacements that will not show.
Use recessed mud-in panels where a grid would look out of place in a living room or hallway.
Hide the seam with trim that matches the surrounding architecture, making the panel look deliberate.
Keep panels level and flush, because a panel sitting proud of the ceiling is visible from every angle.
Finishing is where most corridors succeed or fail. A panel that sits a millimetre proud, a tile that sags, or a grille that does not sit square will be noticed every day, while a corridor that is flat, level, and evenly spaced will be forgotten within a week. The final check should be done standing in the doorway, looking across the ceiling in natural light, because that is the view the household will live with.
Maintaining the Corridor So It Still Opens in Five Years
A removable ceiling only stays removable if it is used. Tiles left in place for years can stick to the grid with dust and paint overspray, and a panel that has never been opened can seize in its frame. The simple habit is to lift each panel once a year, check the services above it, and put it back, which keeps the corridor working and turns a forgotten void into a routine inspection. The same visit is the right time to check duct joints for leaks, look for water stains on pipes, and confirm that no new cable has been draped across the corridor by a later trade.
Spares matter as well. Keep two or three matching tiles and a spare panel latch in the house, because a cracked tile replaced with a mismatched one will show forever. Keep the corridor map, the one drawn before the ceiling was finished, with the house documents, so the next owner or the next technician knows exactly which panel sits above each valve. A corridor with a map is a maintainable system; a corridor without one is a guessing game that ends with the wrong panel lifted and the right valve still hidden.
Ceiling Service Corridor FAQs: Panels, Grids, and Hidden Mechanical Access
How wide should a ceiling service corridor be?
A corridor 600 millimetres wide suits most residential services, because it matches standard grid modules and gives enough room to reach in and work. Wider corridors suit runs with large ducts or several parallel pipes, but they also take more ceiling area, so the width should follow the services rather than a round number. The corridor must be wide enough for hands and tools, not just eyes.
Can I fit a removable ceiling in a fire-rated floor?
Only with fire-rated panels that match the rating of the floor assembly, because an ordinary tile or hatch breaks the fire barrier. Fire-rated access panels are made from heavy-gauge steel with fire-resistant linings and are available in recessed styles that still look seamless. Check the rating with your local building control office before ordering, because the requirement varies with the building and the floor.
Do suspended ceilings look bad in a home?
A well-planned suspended ceiling with matching tiles and a grid aligned to the room can look neat and deliberate, especially in a basement, utility room, or hallway. In living rooms a recessed flush panel system usually suits better, because the panels sit level with the plasterboard and the seam is barely visible. The finish depends on alignment and matching materials far more than on the system chosen.
What services should run inside the corridor?
The corridor should carry the services that need regular attention: heating and cooling ducts with their dampers, water pipes with stop valves, waste pipes with cleanouts, and electrical junction boxes. Services that never need access, such as a straight pipe run with no joints, can stay under fixed plasterboard. Every valve, damper, and junction box should sit within reach of a panel opening.
How do I stop the panels rattling or sagging?
Rattling usually comes from a fan vibrating through the grid or a tile that does not sit flat, and it is fixed with rubber isolators on the fan mount and a check that the grid is level. Sagging comes from tiles absorbing moisture or carrying weight they were not made for, so keep insulation and stored items off the tiles and use moisture-resistant panels in damp rooms. A level grid and the right tile solve most of both problems.
Final Thoughts: A Ceiling Corridor That Turns Repairs Into Minutes
A removable ceiling service corridor is a small act of foresight that pays for itself the first time something above the ceiling needs attention. Planned around the real routes of ducts, pipes, and cables, built with the right panels for the room and the fire rating, and maintained with a yearly lift of each panel, it turns a day of cutting and patching into a ten-minute job. The ceiling still looks like a ceiling, and the house keeps its working parts within easy reach, which is exactly how a well-built home should behave.